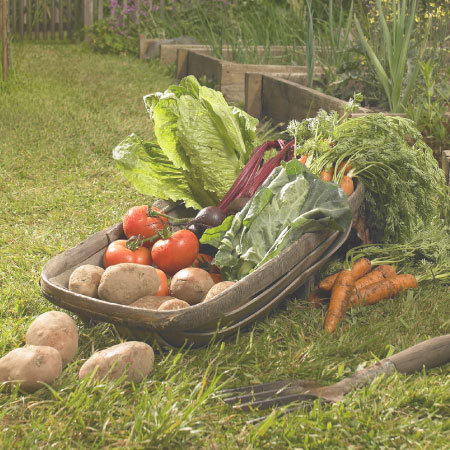
Carol-Anne Besler is an organic vegetable farmer on Salt Spring Island, Canada. She has been studying and practicing Permaculture and alternative living for over 3 years. She is passionate about integrating the wholistic principles of Permaculture with organic farming for a sustainable, Earth and people friendly food system.
Every gardener loves the ease of a raised garden bed, but what if I told you that there is a way to take it to the next level! There is a super simple technique that will not only enhance the flavor of your veggies, but may have you never watering them again. On top of your food being so much tastier and your water use mirroring your ideals, this method will also have you joyfully doing a clean sweep around your property for all of that organic material your neighbor sees as clutter. What burn pile, I ask you? In English we could say 'wood buried in soil', but if you want to add a new word to your garden vocabulary and start rolling with the Permaculture big boys, you can call it 'hugelkultur'. Really, it's so fun to say I think you'll prefer it. Pronounced "hoogel culture", this raised bed method has been kicking around the German frontier for hundreds of years, and has made its way over and popularized in North America with the thanks of Paul Wheaton and Sepp Holzer, to name only a few.
(Speaking of Paul Wheaton and hugelkultur, check out these awesome playing cards that will introduce 54 ways to get your Permaculture on! http://richsoil.com/cards.jsp) Hugelkultur is literally wood and organic matter that has been covered with soil and left alone to rot over the years, resulting in the richest and most fertile growing conditions thanks to the wonders of soil biology. If you ever walk into the forest you can see that fallen trees are slow to rot, but as they shrink and decay they release vast amounts of nutrients into the soil, along with tiny air pockets that allow for space for other growies to take residence and thrive. The decaying logs become porous and trap any moisture that falls and settles like a big sponge. During times of need, like in drought, moisture from the spongy wood will release into the surrounding area, nourishing all of the plants that need it. Who needs irrigation and bagged fertilizer when you've got pals like that on your side? By burying big chunks of wood in the ground you are mimicking mother nature's very own design. Before you start, be warned that not all wood is good wood to hugel with. Some trees, like cedar, old growth redwood, black walnut, and cherry are extremely challenging or toxic, and you'll have a very difficult time getting your hugelkultur to produce anything. Alder, cottonwood, maple, oak, apple, poplar, and birch are all safe bets. If in doubt, read about the trees in your area and see if they are allelopathic, slow to decay, or otherwise toxic to plants. For quality of wood? The more decomposed the wood already is, the better. Fresh wood requires lots of nitrogen to break down, so if it's doing that in your garden there will be much less nitrogen in the soil for the plants to grow. You can use fresh wood, especially if that's what you have and you don't want it laying around, but it will take longer and you will have to exercise even more patience. So, take a look at what you have and gather the right wood; the big wood and the small, twigs, leaves, branches, whatever you have. Check. Next, where do you want it located? If you're looking for maximum sun exposure, running the beds north/south is a safe bet. If you want more indirect sunlight or shade, east/west. Another wonderful feature of a hugelkultur is that it's multi dimensional and will have a variety of different growing conditions for all kinds of plants. As an example, the plants that require the least amount of water and the most direct sun can be planted right on top, like sunchokes and sunflowers, and your more water loving, shade tolerant plants like tender greens and herbs can be planted towards the bottom. Now you can start digging the trench your hugel bed will live. Some people use a shovel, others use an excavator. Whatever tool you have, start removing the top soil or sod, digging down at least a foot or two, and more if you're industrious and it's accessible to you. You want to keep your sod and soil within a shovels distance, so don't go off carting this precious resource away.

As you're digging, think size. A good hugel bed will be about 3-4 feet wide, and about 4 feet tall. Paul Wheaton says make your mounds be upwards to 7 feet tall! Basically, the taller they are the more wood there is to decay and release yummy nutrients into the soil to feed your growies, the more water it will hold, and the longer your hugel mound will produce. Experiment. If you've got neighbors who would call the bad guys on you, then maybe keep them shorter, say 2 feet tall. If you want to have those hugel beds act as a fence, build them 7 feet tall. If you're like me and don't like bending low to harvest lettuce, 4 feet is perfect. This is also where digging a deep trench can be useful, as you can still make that ideal 7 foot mound but sink 3 feet of it underground, leaving you with a reasonable 4 foot mound above ground. Some won't heed any of this advice, and will just plop it all on top of their lawns and be totally successful. Do what works for you, but most importantly, do it! You've dug it up, now fill it in. Take all of the logs and woody bits, and start filling in your hole. As you're piling wood, you can layer with soil and whatever else you have; straw, green matter, dead leaves, manure, kitchen scraps. Keep on piling until you have a steep mound to the size of your liking.

By now your mound probably looks quite frightening if you're aesthetically minded. This is the time where you want to cover what you're just done by piling back on the top soil and sod that you had taken off. If it's sod, flip it over so the grass is face down. Keep piling until all of the woody bits are buried, and what you have looks like a bed waiting to be planted. Exposed wood can wick away moisture from the mound, so be sure it is covered completely. Now, patience. Your new hugelkultur bed is a masterpiece in the making, but the good news is that the hard work is done. Unless you have a lot of rain in your area, you may want to give your hugel bed a really nice big dose of water, and several times more over the course of a few months to help speed up the decomposition. Mulch your bed to keep the weeds out and evaporation to a minimal.

In the first few months, you may just want to let it settle and start to mingle before throwing seeds at it, but if growing conditions are ripe you can get right to it. In the first year you may find you need to irrigate a bit, though I know of many people who have never irrigated and have had major success. The hugel bed is really an investment for the future, as the second year, third year, and beyond is where the magic really is. If you start building your hugelkultur bed right now, by next summer you will find yourself with a no-till, low-maintenance, easy to harvest and thriving garden. For more inspiration on hugelkultur, check out Paul Wheaton's articles, videos, and pictures at http://www.richsoil.com/hugelkultur.
-
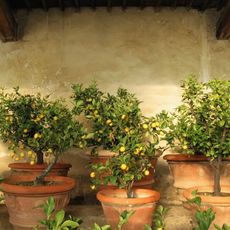 Want a Backyard Mini Orchard? Create Your Own Container Orchard
Easier to care for in small spaces, a backyard mini-orchard makes sense for busy gardeners and juicy fruit is the reward.
-
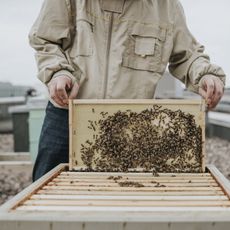 Urban Beekeeping Guide: Top Tips For Raising Bees In The City
Urban beekeeping can be a rewarding and appreciated pastime, but first be sure it’s legal in your city and learn the ropes of beekeeping.

