Gardening Projects

-
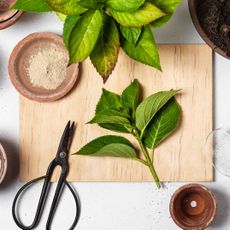
Rooting Plants From Cuttings: Easy Plant Propagation
Rooting plants gives you power over future plants and means you don’t have to buy as many. Here’s how to propagate your favorites with stem cuttings
-
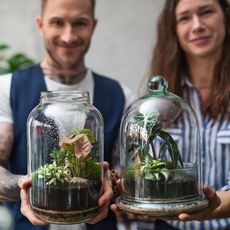
Open Vs. Closed Terrariums: Everything You Need To Know
Deciding between open vs closed terrariums depends on your love of the hobby and the plants you want to grow.
-

Christmas Gift Wrap Ideas: 12 Ways To Embellish Gifts With Natural Materials
These magical Christmas gift wrap ideas incorporate natural elements, evoking the feel of an enchanted woodland.
-

15 DIY Winter Wreath Ideas: Make A Natural Wreath Using Materials From Your Garden
Make a beautiful winter wreath with natural materials. Collect foliage, flowers, berries, fruits, and other interesting garden finds.
-

Pinecone Christmas Crafts – 12 Natural DIY Decor Ideas
Nothing adds a rustic festive flourish more than the humble pinecone – and these Christmas craft ideas are brimming with seasonal charm.
-

Houseplants In Bottles: How To Grow Plants In Water
Growing plants in water, whether houseplants or herbs, is a great activity - especially for forgetful plant waterers. Click to learn more.
-
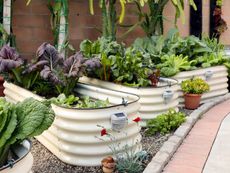
Vego Modular Raised Garden Beds: A Game Changer For Gardeners
Read about our first-hand experience with these easy, accessible, sustainable raised garden beds made by Vego Garden.
-
GKH's Complete Fall And Winter DIY Guide
Bring your garden indoors with these fall and winter DIY ideas. Learn how you can use a handful of natural elements for your holiday decor.
-
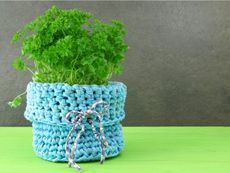
Keep Plants Cozy With A Knit Or Crochet Plant Pot Cover
Want to keep your plants warm this winter? Love to knit or crochet, but already have too many hats? Have we got the project for you.
-

Gender Reveal Seed Paper – Sustainable Gender Reveal Ideas
Make a pulp of scrap paper and water, add seeds, and give to your guests to plant as a living remembrance of the occasion.
-

Free DIY Fall Wreath From Your Backyard
Foraging for fall decorations is a fun fall activity that gets you outside after you've put your garden to bed for the year. Click for more.
-
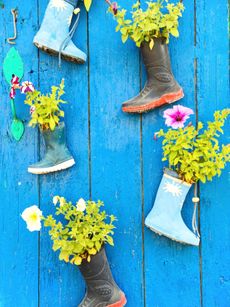
Ideas For The Garden – DIY Projects For Beginner Gardeners
Many DIY garden ideas are perfect for newbies. Simply click here for easy DIY projects for beginner gardeners.
-
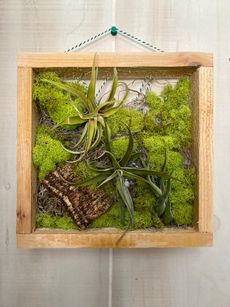
Floating Air Plant Frame
Looking for a fun and easy gardening project you can do indoors? Why not try a floating air plant frame? Click to learn how.
-
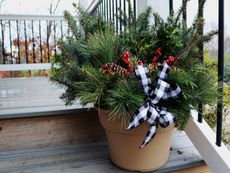
DIY Winter Arrangements: Holiday Porch Pot
Don’t leave those porch containers bare all winter. Add some greenery and berries for a pretty decoration that will last for months on end.
-

DIY Natural Wreath
Learn how you can create this simple, natural Christmas wreath in just 15 minutes. Click to see how we did it.
-

Tips On Photographing Roses & Flowers
I am truly an amateur photographer; however, I have held my own in various photography contests, shows and related events. In this article, I will be sharing tips for taking pictures of roses and flowers.
-
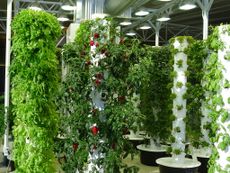
DIY Tower Garden Ideas: How To Make A Tower Garden
Perhaps, you'd like to grow more produce for your family but space is limited. Maybe you're looking to add colorful floral planters to your patio but don't want to infringe on your outdoor living space. Building a tower garden is the solution. Learn more here.


