Winterize Your Garden in 8 Easy Steps

By Chris Molnar | October 4, 2018
Image by Pixabay
by Chris Molnar
October 4, 2018

You planted in spring, mulched all summer and your last harvest is about to take place for fall.

Now what? Are your gardening chores finished for the year? Say it isn’t so!

Never fear, fellow botaniphiles: there is something you can do, even as temperatures begin to fall and that delightful autumn nip hits the air. When that last huge basket of veggies makes its way to your kitchen, it’s time to winterize!

The best part: it’s actually very simple. In fact, we’ve gathered the nine critical steps you’ll need to ensure a happy, and prosperous, spring for your garden. Here’s all you need to do.

Step One: Discover Your Gardening Zone

Your first step is to make sure you know when first frost will occur. While only Mother Nature knows for sure, you can take a tip by looking on the USDA Plant Hardiness map to find out what zone you’re planting in.

You’ll want to start the following steps after first frost even if you still have plants growing (unless they’re winter varieties you planted in summer or fall).

An even easier tip: the Farmer’s Almanac has this nifty calculator. Simply enter your zip code and find out when first frost is projected to occur.

Bypass Pruning Shears from Cate’s Garden

Step Two: Clean House

While it’s true that the earth self-mulches by allowing plants to decay, when not overseen by a practiced composter, this process is typically quite slow. In woods and other natural areas, slowly decaying plant material is the prime locale for pests to reside to get away from the cold. It’s no different in your garden.

Simple solution: don’t leave debris in your garden beds. Clear it out and get out those pruning shears to prune your bushes so there is space and circulating air between branches. Pull out dried vines and fallen leaves.

Remember to continue this process through the winter, as more debris will fall into your garden.

Step Three: Get a Grip on Weeds

Don’t let weeds winter over in your garden. You may be surprised what crops up even after your summer plants are gone. So do keep up with this important winter-proofing step.

Do an initial weeding during the Clean House step, and keep checking back periodically through the winter to make sure there are no lurkers trying to break through.

Hand Tool Set from Cate’s Garden

Step Four: Tend to Your Bulbs

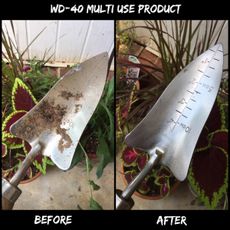
Not all bulbs will survive a frozen winter. For more sensitive varieties, dig up and store bulbs in a cool, dry locale. Tip: a good hand tool set makes this task easier.

For bulbs that will be staying in the ground for a spring bloom, add an extra 6″ of mulch or compost above the area when extremely cold temperatures are predicated.

Although many bulbs last the winter (in fact, that’s their growth pattern), a particularly bitter snap could result in some losses. Make sure to put in your ounce of prevention here.

Step Five: Add Compost

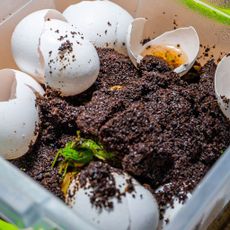
When you first clean up your beds for the winter, add a little compost to the entire garden. It will slowly decompose further through the winter and provide nutrients and warmth.

Step Six: Hydrate Your Evergreens

Even if you live in a rainy or snowy area, your evergreens may be lacking in moisture at the start of the season. If you’ve had a dry autumn, make sure to water all evergreens well. Do this before the first freeze.

Step Seven: Protect What’s Aboveground

Set up a simple windbreak using stakes and tarp to protect any wintering-over plants that are aboveground. Do this for your evergreen bushes, too.

This may not be necessary in all locales, but you never know”¦Mother Nature can surprise you!  Having a windbreak handy in case of a sudden predicted storm can mean saving your garden.

Step Eight: Baby Your Saplings

Believe it or not, there’s such a thing as tree tape! It’s specifically designed to protect sapling trees or new bark on mature trees. Wrap your “babies” well against the cold and heavy winds.

Make sure to use tape designed for this purpose – don’t try another type of tape. You may harm tender new bark, especially when spring comes.

That’s it – eight simple steps to make sure your garden survives, and thrives, through wintertime. Now sit back and relax…or if you’re like us here at Cate’s Garden, stay busy by planning next spring’s setup!

The above article was sponsored by Cate's Garden. The information contained in this article may contain ads or advertorial opinions.
This article was last updated on
Read more about Garden Trends
Did you find this helpful? Share it with your friends!

Browse Dozens of Our FREE Gardening Guides Today

Whether your dream garden is a houseplant sanctuary, a bountiful vegetable garden, a pollinator paradise, a bright and bold flower bed, or a backyard oasis – Gardening Know How has the perfect gardening guide just for you.

Click the button below to access more than 3 dozen of our completely free and completely comprehensive guides to growing your dream garden.

Join Us - Sign up to get all the latest gardening tips!